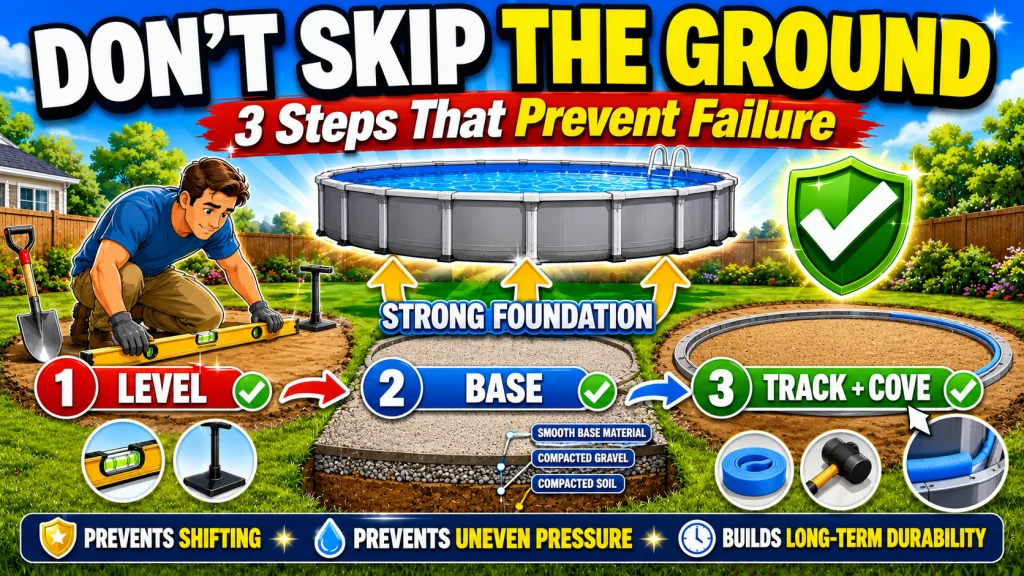
Ground preparation is the phase of an above ground pool installation that takes the most time, causes the most arguments, and produces the most regret when it gets rushed. It isn’t one task, it’s three: leveling the ground, choosing and placing the base material, and setting the track and bottom cove correctly, done in that order because each one depends on the last. This guide explains why those three sub-tasks matter and why skipping any one of them shows up as a problem months later, not on day one. It doesn’t walk through the steps themselves, since each sub-task has its own full guide for that.
Why Ground Preparation Decides the Pool’s Whole Lifespan
Above ground pool ground preparation is the phase many installers dread, and it’s also the one that does the most to determine how the pool holds up afterward. It’s the first of the three phases that make up the full above ground pool setup process, and it’s the one that decides whether the other two even have a fair chance. A pool set on a properly prepared base has a real shot at 15 to 20 years of structural life, assuming chemistry and seasonal care hold up their end too. The same pool, same kit, same water, set on pushed dirt that was never leveled correctly, tends to start showing problems within a season or two. The ground underneath is usually the difference.
The reason this phase gets rushed so often is that it’s the least satisfying part of the whole project. There’s no visible progress the way there is once the wall goes up or the liner goes in. It’s just digging, checking, and digging again, and it’s tempting to call the ground “close enough” once you’re tired of shoveling. That instinct is behind most of the failures I get called out to look at, and it’s rarely obvious at the time. The ground looks fine, the pool goes up without a hitch, and most people move straight to filling it. The problem doesn’t announce itself until months later, once water weight and time have had a chance to expose whatever was actually there.
These aren’t three independent choices you can mix and match in any order. Leveling has to happen first because you can’t judge whether a base material is doing its job on ground that isn’t level yet. The base material has to be settled before the track and cove go in, since both depend on a stable, even surface underneath. Get an earlier step wrong and the next one doesn’t fix it, it just buries the mistake under something that looks finished.
Why Leveling Isn’t Just “Getting It Flat”
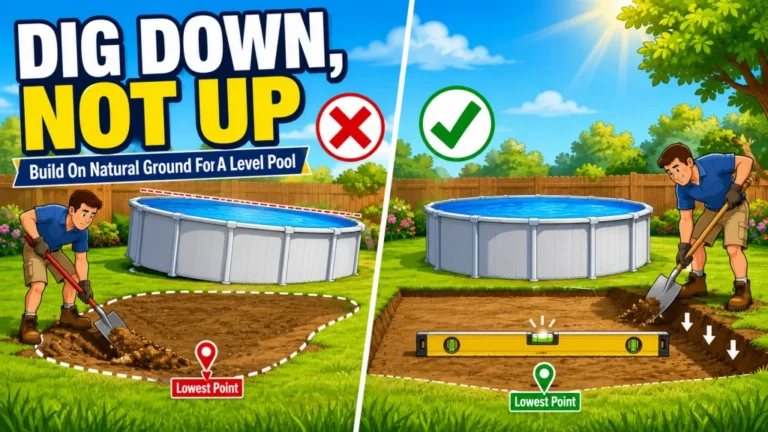
Leveling comes first in the sequence, and it gets treated like a quick check with a 2×4 and a level, which is roughly true for a patio or a shed. A pool is different because the ground isn’t just holding weight, it’s holding thousands of gallons of water that redistribute pressure across the entire footprint the moment the pool starts filling. A slope that looks negligible standing next to an empty pool can become a real structural load once the water goes in, pushing harder against one section of wall than the rest.
This is where the decision between digging down to the lowest point versus building up the low spots with added dirt matters more than most first-time installers expect, and it’s a decision with real consequences either way depending on which direction you go. Getting this specific call right, and understanding exactly why one direction tends to settle unevenly over time while the other holds, is covered in full in the leveling guide for above ground pools. What matters here is understanding that this single decision often separates a pool that stays level for two decades from one that starts leaning within a season or two.
Why the Base Material Choice Isn’t One-Size-Fits-All
Once the ground is level, what goes between the soil and the liner is its own decision, and it’s one where I see the most conflicting advice online. Sand, foam pads, crushed stone, and full concrete pads all solve the same basic problem, cushioning and protecting the liner from what’s underneath, but they solve it with real tradeoffs in cost, labor, and long-term stability that don’t get honest treatment in most quick buying guides.
The mistake I see most isn’t picking the “wrong” material outright, since more than one option can work well for a given situation. It’s picking a base material based on price alone without understanding what each one actually protects against or how it behaves once thousands of gallons of water are sitting on top of it. A material that’s fine for a 15-foot inflatable can be genuinely inadequate under a 24-foot steel wall pool, and that distinction rarely gets explained clearly. The full comparison of sand, foam, crushed stone, and concrete pad options, including where each one is worth the extra cost and where it isn’t, is covered in the base material guide for above ground pools.

This pool pad uses 300g/㎡ high-density double-layer geotextile fabric with heat-pressed technology for stronger puncture resistance than standard 200GSM pads. It forms a protective barrier against sharp rocks, roots, sticks, and debris while acting as a weed barrier, working on grass, sand, gravel, concrete, dirt, and patio surfaces. Precisely sized for 18-ft round pools, it fits Intex, Bestway, and Summer Waves frames with a seamless, wrinkle-free one-piece design and tool-free installation. The black material absorbs sunlight to help warm the water, and the reinforced fabric resists shifting or compressing under heavy use.
Check On AmazonIf you click this link and buy, we earn a commission at no additional cost to you.
Why Track Placement and the Cove Get Skipped, and Why That’s a Mistake
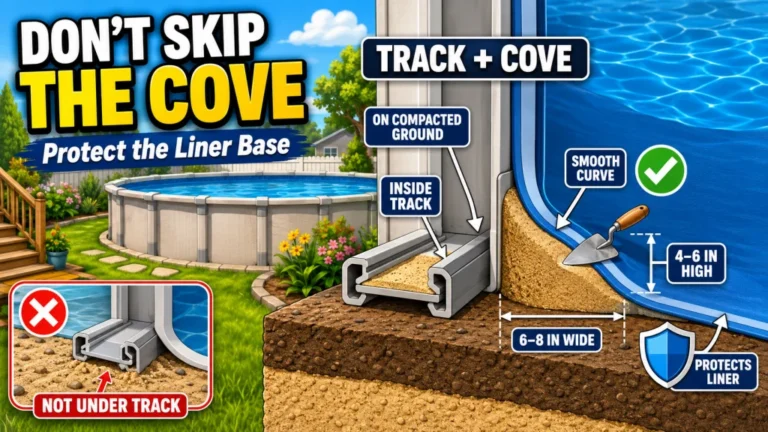
This is the step most DIY guides don’t mention at all, which is exactly why it causes so many liner problems that owners can’t trace back to a cause. The track is where the pool wall and liner actually meet the ground, and the cove is the sloped transition at the base of the wall where the liner needs somewhere to fold that isn’t a sharp edge. Skip or rush this step and the liner has nowhere to go but against a hard corner, which is where seams crack first.
Because this phase produces no visible result, no bump, no obvious gap, it’s the easiest of the three to convince yourself doesn’t matter for your specific pool. In practice it matters for nearly every setup, and the owners who skip it are often the same ones calling a season or two later asking why their liner is failing at the base of the wall with no obvious cause. The full explanation of correct track placement and cove construction, including how it differs by pool type, is covered in the track and cove guide for above ground pools.

This foam cove offers a consistent, durable alternative to sand coves at the wall to floor junction, protecting the liner without shifting or settling over time. Made from engineered HDPE, it holds its shape under water pressure to prevent stretching, ballooning, and punctures. It requires no annual sand building or leveling, and is compatible with standard pool liner pads and wall insulation. The peel and stick backing allows tool free installation on any clean, dry surface, making it ideal for DIY liner replacements.
Check On AmazonIf you click this link and buy, we earn a commission at no additional cost to you.
Final Thoughts: Three Jobs, Not One
The owners who get ground preparation right almost never describe it as complicated. They describe it as slow, and they treat that slowness as the point rather than an obstacle. Leveling, base material, and track and cove placement each have their own failure mode, and rushing any one of them to get to the parts of setup that feel more like progress is where a 15-year pool turns into a 2-year pool.
Once the ground itself is handled correctly, assembly and the first fill are the next phase, and that’s covered in the assembly guide for above ground pools, which assumes the ground work here is already done right.
Explore Each Ground Preparation Task
Leveling, base material, and track and cove placement each have their own full guide with the exact steps for your pool type and ground condition.
| Guide | What it helps with |
|---|---|
| Leveling Guide | The dig-down method, tools needed, and how to check level across the full footprint. |
| Base Material Guide | Sand, foam, crushed stone, and concrete pad options compared by pool type and budget. |
| Track and Cove Guide | Correct track placement and cove construction by pool wall type. |
Start with leveling if you haven’t broken ground yet. The other two only matter once that foundation is right.
FAQs
🏗️ Why does ground preparation take so much longer than the rest of setup?
Because it covers leveling, base material placement, and track and cove construction, each a distinct task with its own way of going wrong, not one single step. Rushing any of them to save time is where most long-term pool problems start.
📏 Is leveling really that important if the ground looks flat already?
Yes. A slope that looks negligible next to an empty pool becomes a real structural load once thousands of gallons of water are pushing against the wall unevenly. What looks flat to the eye often isn’t flat enough for a filled pool.
🧱 Do I really need a specific base material, or will any sand work?
The right choice depends on your pool size and type, not just what’s cheapest or available. A material that’s fine under a small inflatable can be inadequate under a large steel wall pool once the water weight is added.
🩹 What happens if I skip the cove at the base of the wall?
The liner has nowhere to fold except against a hard edge, and that’s where seams crack first. It’s an invisible mistake at setup that usually shows up as a liner failure a season or two later.
Sources and References
The lifespan claims and ground preparation principles in this guide are cross-checked against the following:
- Manufacturer ground leveling and base preparation guidance, used for the relationship between an unlevel base and structural strain once a pool is filled.
- Above ground pool site preparation guidance, used for the consequences of building up low spots instead of digging down to the lowest point.
- Above ground pool foundation and base material comparison, used for the tradeoffs between sand, gravel, and concrete pad base options.