Above ground pool liner installation only gets one real shot at being wrinkle-free, because any wrinkle still there when water covers it gets molded permanently into the vinyl. There is no fixing it afterward short of draining the pool and starting over. This walks through why that happens, the drape-and-smooth sequence that keeps the liner flat as it goes in, and the wet-dry vacuum technique that pulls the vinyl tight against the wall and floor before the water does the job for you. It covers liner installation technique only, not wall assembly or managing the first fill once the pool is full.
Wrinkles That Set During Filling Are Permanent
Above ground pool liner installation has exactly one moment where mistakes are still fixable: before the water covers them. Once a wrinkle is submerged and the pool keeps filling, it is not coming back out short of draining the pool and starting the installation over. That sounds harsh for something as simple as a fold in vinyl, but the reason comes down to how the material itself behaves once water weight gets involved, which is worth understanding before you touch the liner.
The good news is that a wrinkle-free installation is genuinely achievable with a predictable sequence: drape the liner correctly, smooth it from the center out, and use a wet-dry vacuum to pull it tight before you let the water do anything. Skip any one of those steps and you are gambling on the water pressure fixing a problem it is actually more likely to lock in place.
Why Liner Wrinkles Become Permanent
Vinyl pool liner is thermoformed to the shape of the pool it was made for. Once water weight pushes the liner flat against the pool floor and walls, the vinyl conforms to whatever shape it happens to be sitting in at that exact moment. If it is sitting flat, it stays flat. If it is folded into a wrinkle, that fold becomes part of the liner’s new resting shape.
This is the part a lot of first-time installers do not expect. A wrinkle in an empty pool looks like a minor cosmetic issue you can deal with later, like a rug that needs straightening. Vinyl under water weight does not work that way. Once the fold is trapped under enough pressure, the vinyl effectively remembers that shape, and the only way to reset it is removing the water weight that locked it in, which in practice means draining the pool.

Made from virgin vinyl with LamiClear protection against chemicals and fading, this overlap liner fits 24-foot round above-ground pools with 48- to 52-inch walls. It is perma-sealed to help protect against leakage and has cold-crack resistance for winter conditions. Coping strips are required and sold separately.
Check On AmazonIf you click this link and buy, we earn a commission at no additional cost to you.
The Warm Liner Advantage
Cold vinyl is stiffer, and stiffer vinyl is more prone to wrinkling because it resists draping naturally into the corners and along the floor. If you are installing in cool weather, do not pull the liner straight out of a cold box or a cold garage and expect it to lie flat.
Leave the folded liner in direct sunlight for 30 to 60 minutes before you start. The warmth makes the vinyl noticeably more pliable, and pliable vinyl drapes into the pool’s actual shape instead of holding onto the memory of however it was folded in the packaging. This single step costs you almost nothing and it makes the entire drape-and-smooth sequence that follows meaningfully easier.
The Drape and Smooth Sequence
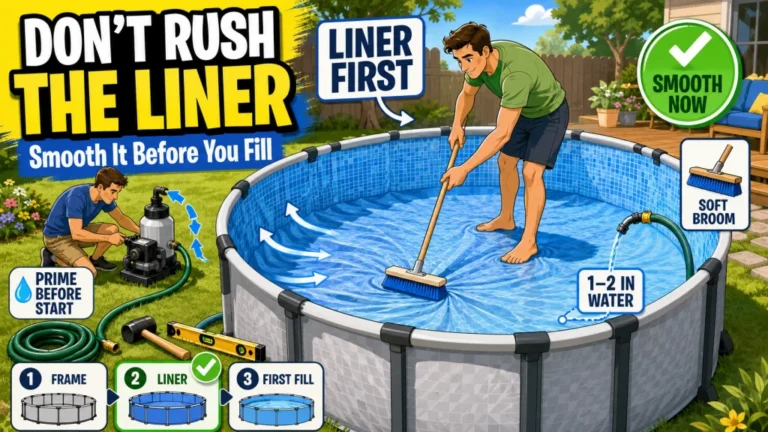
Unfold the liner in the center of the pool floor first, not against a wall and not in a corner. Working from the center outward gives you control over where excess material ends up, rather than letting it bunch wherever the liner happens to land.
- Unfold the liner starting at the center of the pool floor
- Smooth the vinyl flat as you work outward toward the walls, rather than smoothing in patches
- Hook the liner bead over the top of the pool wall starting at one point, then work around the pool in one direction
- Resist the urge to pull wrinkles out by stretching the vinyl; smooth them toward the wall bead instead
That last point trips up more first-timers than anything else in the sequence. Pulling on a wrinkle to stretch it flat can distort the vinyl or shift the overlap at the wall, which just trades one problem for another. Smoothing a wrinkle toward the nearest wall, so the extra material ends up tucked into the bead rather than stretched thin across the floor, keeps the liner’s shape intact while still getting rid of the fold.
The Wet-Dry Vacuum Technique
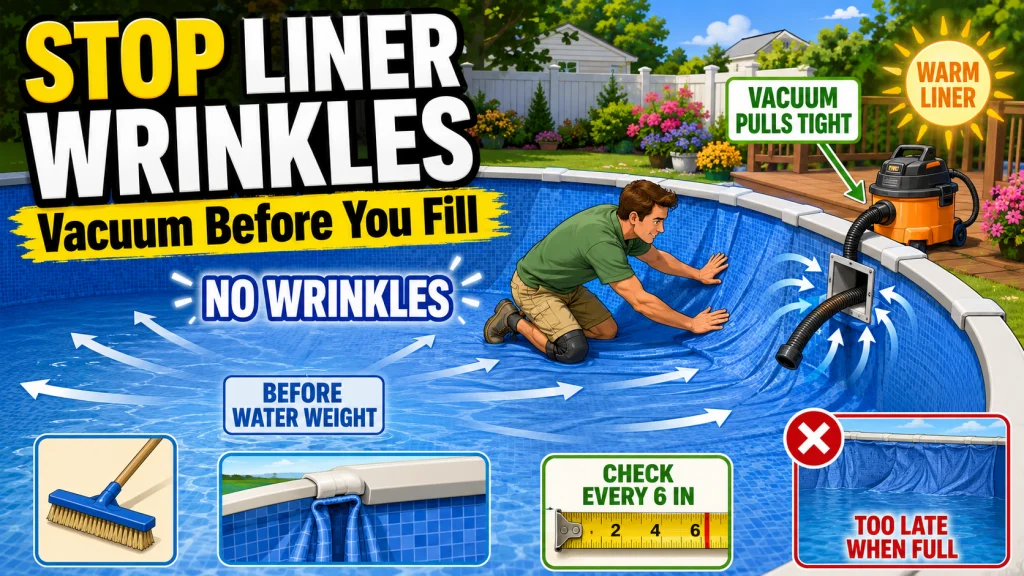
Once the liner is draped and hooked around the pool, a wet-dry vacuum is the most reliable way to finish the job before water goes in. According to The Home Depot’s pool liner installation guide, the technique involves running the vacuum hose into the skimmer hole on the exterior pool wall and turning it on to begin pulling wrinkles out of the liner from behind, essentially suctioning the air out from between the liner and the pool structure so the vinyl pulls tight.
Field Note: The first few minutes with the vacuum running are where you actually see the truth about your drape job. Wrinkles that looked minor while the liner was dry often reveal themselves clearly once the vacuum starts pulling the vinyl taut. That is a good thing, not a setback. It is much easier to fix a wrinkle you can see and reach than one hiding under a foot of water three hours from now.
Once the vacuum has pulled the liner tight against the wall and floor, start adding a small amount of water while the vacuum keeps running. This combination, light suction plus a little water weight, is what actually sets the liner into its final position without trapping anything underneath it. Keep working any wrinkles you still see toward the wall with your hands while the water trickles in, since this is your last real window to make adjustments before the vinyl is holding its shape on its own.
If the Vacuum Does Not Pull the Liner Tight
Sometimes the vacuum runs for several minutes and the liner still looks loose instead of snugging up against the wall. Before assuming something is wrong with your technique, work through the usual culprits in order. Check for air leaking in anywhere it should not be, especially around the skimmer cutout, return fitting, or any gap between wall panels, since a leak there gives the vacuum somewhere easier to pull air from than the space behind the liner.
Next, confirm the hose itself is actually positioned between the liner and the pool wall rather than sitting in the wrong gap or pinched somewhere along its length. A hose that has slipped out of position will still run and sound like it is working, but it will not be pulling air from where you need it to. If the liner was seated loosely at the edge before you started the vacuum, that loose section can also be quietly leaking air and killing your suction, so recheck the liner edge around the whole pool before troubleshooting anything else.
If everything above checks out and you still have stubborn wrinkling specifically at the corners, that is usually not a vacuum problem at all. Corner wrinkling that will not respond to suction typically traces back to the cove or base underneath, not to anything the vacuum can fix from above.

This 5-gallon wet/dry vacuum combines a 4.5 peak HP motor with a stainless steel tank. It includes a 1.25-inch-diameter, 7-foot hose and a 6-foot power cord, providing a compact setup for wet and dry pickup jobs.
Check On AmazonIf you click this link and buy, we earn a commission at no additional cost to you.
Liner Overlap Management as the Pool Fills
The liner edge or bead has to stay seated over the top of the pool wall and under the top rail the entire time the pool is filling, and it will not simply stay put on its own during the first stretch of water. Walk around the pool every 6 inches of water depth and check every section of the edge, reseating anything that has slipped loose.
Water weight eventually holds the liner in position on its own, but the first 12 inches of water are the critical window where the edge is most likely to pop loose from a section of the wall track. Skipping a lap around the pool during this stretch is how a section of liner ends up hanging loose at the top just as the water gets deep enough that you cannot easily fix it without draining back down.

This set contains 38 plastic coping clips for securing an overlap liner during replacement or installation. The professional-grade strips are designed as an installation aid and are intended to be replaced when the overlap liner is replaced. The supplied color may be black, white, or gray.
Check On AmazonIf you click this link and buy, we earn a commission at no additional cost to you.
The Three Wrinkle Types and What Causes Each
Not every wrinkle comes from the same mistake, and knowing which type you are looking at tells you where to actually focus your fix rather than pulling at the vinyl randomly.
| Wrinkle Type | Where It Appears | Common Cause |
|---|---|---|
| Floor wrinkles | Across the pool floor | Excess liner material left on the floor from improper centering during the drape |
| Wall wrinkles | Along the pool wall | Liner bead slipping out of position before water weight holds it in place |
| Corner wrinkles | The wall-floor junction | Insufficient cove material at the base of the wall |
Floor and wall wrinkles are both fixable within the installation window described above, using the smooth-toward-the-wall technique and the every-6-inch bead check. Corner wrinkles are a different story, since they trace back to how the cove was built before the wall and liner ever went in, not to anything you did during this stage. If you are dealing with recurring corner wrinkles, the fix belongs earlier in the process, not here.

This 22-pack contains 48-inch foam cove pieces rated at 1.8 pounds per cubic foot. It is sized for 18-foot by 33-foot oval or 28-foot round above-ground pools. The peel-and-stick design simplifies installation and is intended to reduce excessive liner stretching and premature wear.
Check On AmazonIf you click this link and buy, we earn a commission at no additional cost to you.
Final Thoughts: You Get One Clean Window
Liner installation rewards the same patience that wall and frame assembly does, just compressed into a shorter window. Warm the vinyl, drape from the center, smooth instead of stretch, vacuum the air out before water goes in, and keep checking the bead every 6 inches of water depth. None of those steps are difficult on their own, but skipping any of them is how a wrinkle that could have been smoothed out in five minutes ends up permanent for the life of the liner.
If you are working through the structure before this stage, the full above ground pool wall and frame assembly process covers what needs to be solid before the liner ever goes in, and the broader above ground pool setup guide shows where liner installation fits in the overall project. Once the liner is set and the first few inches of water are in, the next stage is managing the first fill of an above ground pool, which comes with its own separate set of mistakes to avoid.
FAQs
🏊 Can I fix a pool liner wrinkle after the pool is already full?
Not without draining the pool. Once water weight has set a wrinkle in place, the vinyl has thermoformed into that shape and will not smooth out on its own. The only real fix is lowering the water enough to release the vinyl and reworking the liner.
☀️ Does the temperature of the liner actually matter before installation?
Yes. Cold vinyl is stiffer and resists draping smoothly into corners and along the floor. Warming the folded liner in direct sunlight for 30 to 60 minutes before installation makes it noticeably easier to smooth flat.
🌀 Do I really need a wet-dry vacuum to install a liner?
It is the most reliable method for a wrinkle-free installation. Running the vacuum through the skimmer hole pulls air out from behind the liner and draws the vinyl tight against the wall and floor before water weight takes over, catching wrinkles you can still fix.
📏 How often should I check the liner bead while the pool fills?
Every 6 inches of water depth, especially during the first 12 inches. That is the window where the bead is most likely to slip out of the wall track before water weight holds the liner firmly in place.
🔍 What’s the difference between a floor wrinkle and a corner wrinkle?
A floor wrinkle comes from excess liner material left on the floor during the drape and is fixable during installation. A corner wrinkle at the wall-floor junction usually traces back to insufficient cove material built before the wall went in, which is a different problem to address earlier in the project.
Sources and References
- The Home Depot’s guide to installing a pool liner confirms the wet-dry vacuum technique, running the hose through the skimmer hole, and adding water gradually while continuing to smooth wrinkles by hand.
- Trouble Free Pool’s community discussion on using a shop vac to set a pool liner supports the practice of running the vacuum until water covers the base of the wall before removing it.
- In The Swim’s installation guidance on using a vacuum to install a vinyl liner confirms sealing air gaps around wall panels and the skimmer before running the vacuum, and working wrinkles toward the pool edge as the vacuum pulls the liner tight.